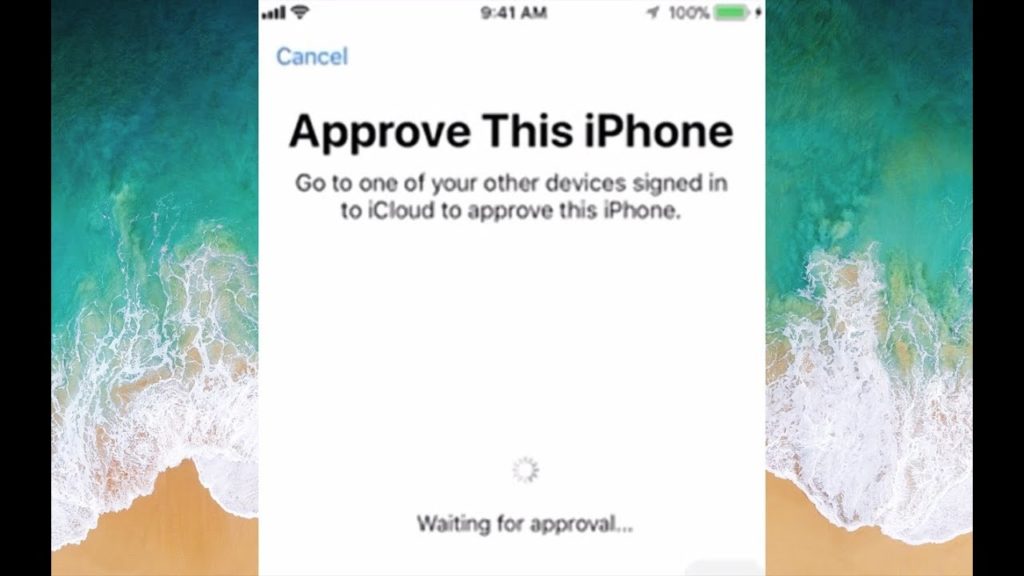
Who doesn’t approve an iPhone? Except, the device itself, sometimes it requires you to approve the iPhone by going to one of your other devices signed in to iCloud. In this post, we will discuss the same matter. I’ll provide brief information on How to approve iPhone via Mac or other iOS devices. I’ll also provide methods to completely avoid the process. In case you were stuck with the situation where your iPhone is demanding an approval, you have come to the right place. Just keep on reading and you’ll know what to do.
Also, we’ll take a quick look at “Approve this iPhone” stuck issue. Let’s go.
How to Approve iPhone using Mac or other iOS device
Apple devices are the safest devices when it comes about the security of your data. This Approve the iPhone system is a part of the security verification for the devices. Apple requires you to approve your new or upgraded iPhone using your another iOS device or Mac, in order to make sure that no one is trying to sneaking into your data. You can also disable this feature, but I’d recommend you let it turned on for security purposes. Now let’s move to the steps required for approving the iPhone via Mac or other iOS devices.
Step-Wise Procedure
Follow these steps in order to approve your iPhone using your Mac or other iOS devices WHEN your iPhone is demanding for an approval:
Step-1: Get the verification code
- Firstly, go to your Mac or another iOS device (iPad/iPhone) where your iCloud account is logged in.
- Now go to Settings.
- Next, click on Apple ID.
- Next, go to Password & Security.
- Then, click on the Get verification code option.
- Finally, tap on OK.
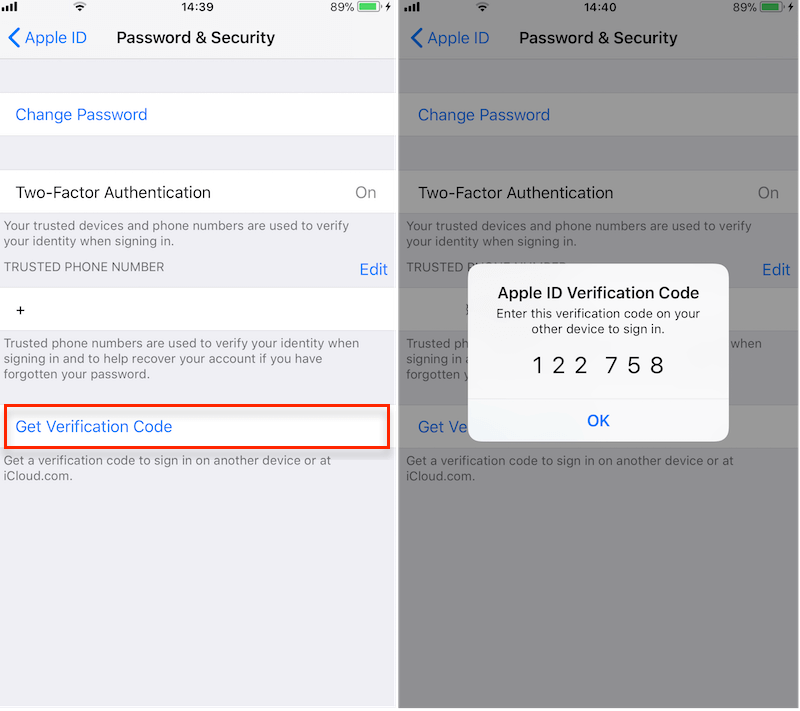
Step-2: Use the verification code.
- Go back to your device which was asking for the approval.
- Now you’ll see the tab asking for approval is gone. Hence, your iPhone is approved.
That’s it.
Also Read: iCloud Activation Bypass Tricks
2 Ways to avoid “Approve this iPhone” feature
If you are among the few who are frustrated by this iPhone feature, I’m providing you two methods that’ll help you avoid it. Remember that this feature solely works for the security of your iCloud data. Therefore, disabling it might put your data at risk. I’d suggest you let this feature serve its purpose, and not turn it off. Nevertheless, here are the 2 ways to avoid the Approve the iPhone feature. Let’s take a look at them.
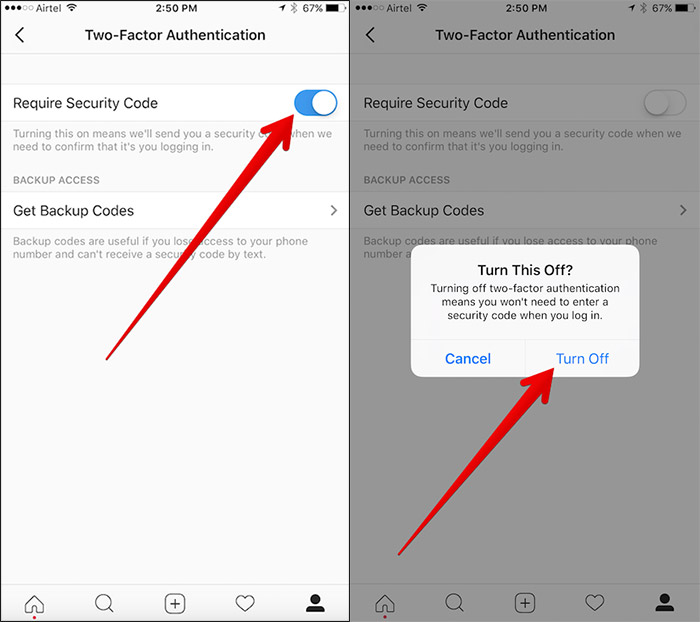
1. Turn off Two Factor Authentication
You can simply avoid Approve the iPhone feature by turning off the two-factor authentication. Follow these steps in order to learn how:
Step-1: Firstly, click on Cancel to skip the window asking you to approve the iPhone.
Step-2: Now go to Settings in your iPhone.
Step-3: Next, go to Apple ID.
Step-4: Then, go to Password & Security, and then go to Two-factor authentication.
Step-5: Now turn off two-factor authentication.
Doing this will require you to reset your iCloud and iTunes account password. Nothing will happen to your data. You’ll receive an email for the authentication. Just click on the link provided in the email.
Step-6: Afterwards, retry the Approve the iPhone feature by the red flag present in Settings. Now your device will be automatically approved without doing anything.
Done.
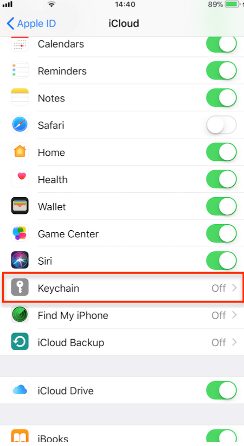
2. Turn off iCloud Keychain
This another method to avoid the Approve this iPhone feature. Follow these steps in order t learn how:
Step-1: Firstly, click on Cancel to skip the window asking you to approve the iPhone.
Step-2: Now go to Settings in your iPhone.
Step-3: Next, go to Apple ID.
Step-4: Now turn off iCloud keychain.
Step-5: Next, switch off your iPhone and then switch it on again.
Step-6: Once again visit Settings, then Apple ID and then turn off iCloud keychain again.
Step-7: Finally, retry the Approve this iPhone window. You’ll notice that it is gone now.
That’s it.
These were the two methods to avoid the Approve this iPhone feature provided by Apple in iOS and Mac devices. Keep in mind that I don’t suggest using them. Though you might use them if needed at your own risk. Only you’d be responsible if someone tries to steal your data sometime in the future.
How to Approve Mac using iPhone or iPad
The same Approval feature is also present in Mac by Apple for the security of iCloud data. If you are on Mac and trying to approve your Mac using your iPhone or iPad, you can read from here. You can approve the Mac in the same way you approved the iPhone. Just follow these steps and you’ll learn the procedure:
Step-1: Firstly, go to the System Preferences on Mac.
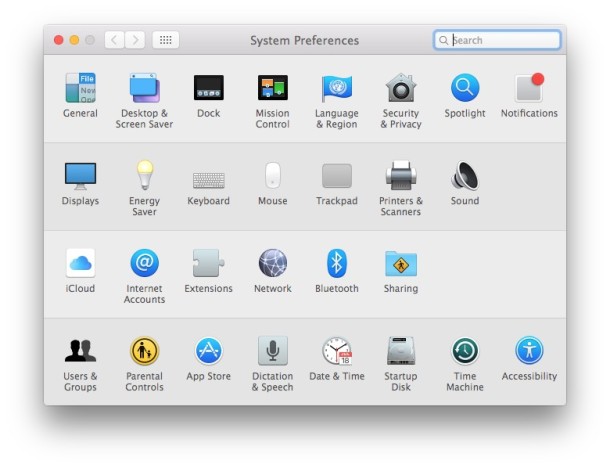
Step-2: Now click on iCloud. Type in your iCloud id and password. When you do that, it will remind you that you require 6 figures or Apple ID Verification code to approve this Mac.
Step-3: Next, just open your iPhone which is already signed in to iCloud. It will automatically prompt you there is another device on that iCloud and it will ask you to allow it or not. Just click on allow and it will provide you the Apple ID Verification Code.
Step-4: Finally. enter the Apple ID Verification Code on your Mac.
This way you have successfully approved Mac on iCloud. The procedure of approving iPhone and Mac is almost similar, only some steps are different. You now know about both.
Summary
You have now learned how to approve iPhone using the Apple ID Verification Code available on your other iOS device. Also, you know the two methods to completely avoid this Approve the iPhone feature. Make sure that you don’t disable the feature permanently as it would put your data at risk. Additionally, you also know about approving your Mac using iPhone or iPad.
If you own an iPad and want to approve it, the procedure would be the same as the procedure for the iPhone. For further information about this topic, you can visit the official Apple forums. For any queries, doubts or suggestions, feel free to interact with the Comment box below. Explore this post too when your iPhone stucks on verifying update.
![9 Best Font Managers for Mac [Free Apps] – 2024 Guide](https://www.digitalcare.top/wp-content/uploads/2019/07/FontExplorerX-211x150.jpg "9 Best Font Managers for Mac [Free Apps] – 2024 Guide")
![iPhone Touch Screen Not Working [Real Ways to Fix] – 2024 Guide](https://www.digitalcare.top/wp-content/uploads/2019/07/Capture1-211x150.png "iPhone Touch Screen Not Working [Real Ways to Fix] – 2024 Guide")
![How to Defrag Mac: Is it Needed? [Explained] – 2024 Guide](https://www.digitalcare.top/wp-content/uploads/2019/08/Snap1-211x150.png "How to Defrag Mac: Is it Needed? [Explained] – 2024 Guide")